Before I get to the most recent pour day, I want to detail the amazing quantity and variety of inspections I have on this project! Here they are, not in any particular order:
PRIVATE INSPECTORS
Geologist: This private inspector must approve each excavation and every trench I cut, before the steel is laid and the footings are poured. He also inspects vertical cuts in the hill for stability. This is a representative of the company that did my original Soils Report.
Structural Observation: Every time I install reinforcing steel (rebar) and before I have the city inspector come, I am required to have this licensed engineer inspect my work. He is basically acting as a representative of the original design engineer, who would normally do these inspections, except for the fact that my engineer is located in Oregon! He reviews the structural plans and makes sure I have done everything as designed.
Compaction Inspector: This is another private inspector working for the Geologist. He inspects and tests the compacted soil (See entry on April 24, 2008). He also inspects the French Drains before retaining walls are backfilled.
Deputy Inspector: This private inspector is present whenever I am pouring the high strength 3000 psi concrete. His job is to make sure the concrete is placed as designed by the structural engineer, so that full strength will be achieved. He also takes samples of the concrete right from the concrete truck which are tested by at laboratory for strength at 7 days, and then at 28 days. The concrete must reach a certain percentage of it's full design strength before I can take off the shoring, and must reach the full 3000 psi by 28 days. So far, my tests have all gone very well, in some cases my samples have surpasses the full design strength by the 7 days!
CITY INSPECTORS
Grading Inspector: This representative from Public Works Department inspects all excavations and french drains after the Geologist has done his inspections. He is also concerned with making sure that the cut slopes are properly protected from erosion during the rainy season, and that no run-off will end up on the public roadways. He will also give final approval to all grading and site drainage to make sure it is safe and conforms with codes.
Electrical Inspector: Pre inspects all electrical work.
Mechanical Inspector: Pre inspects all HVAC ducting and equipment.
Plumbing Inspector: Pre inspects all plumbing work.
Building Inspector: After all of the other inspectors have made their reports, the Building inspector must visit, review the other's reports, and sign off.
Only after ALL of these inspections can I proceed to the next step!
Then, when I am at a certain stage, my City Planner who helped me through the Design Review process will do a site inspection to make sure I am building what was approved. When I am all finished I will need sign-offs from just about all of them before I get the Certificate of Occupancy, but that is still a little while off! I don't want to get too far ahead of myself!
Back to the current stage, the Kitchen Slab!
When all the steel was placed, I called for my structural observation inspection last Friday. That went well, so I called for the building and plumbing inspection. Well, I thought I was ready to pour! I had to redo the tiny bit of plumbing that would be buried by the concrete, but that was a quick change, and I passed inspection on Tuesday. Here is the island sink vent:
I also got the ducting inspected and approved, so on Wednesday the Building Inspector came by and approved me. On Thursday, we had a relaxed morning getting ready for the pour. The first truck arrived at 11:00 and everything went very well! The forms all held without any leaks, and the finishers helped all along the way making the pour very successful. Then, just as the last truck left and the finisher were about to do their final pass, the clouds broke open and there was a huge downpour!

I stood there watching as the nice smooth finish got pockmarked by the huge drops of rain!
Oh Well! It really doesn't matter, because it will all be covered by the finished floor material, but the finishers were disappointed that they couldn't leave it as perfect as usual. During a break in the storm I tried to put plastic down to protect as much slab as I could.
On Friday it rained off and on most of the day, so I took time driving around town and making some decisions! I ordered the Iron Entry Door, and discussed the huge amount of iron railings that will need to be fabricated. I also visited a members only flooring supplier and found some really nice options.
On Saturday Morning Kyle and his girlfriend Annette came and worked with me for a few hours. We moved a bunch of the bags of ICFs, making room to start building walls.
Then, while I measured and set the metal channel that would align the first course of ICFs, Kyle and Annette started building ICFs.
It was really great having them help out! This afternoon Jeanne and Evan also came by to tour the house, and it was wonderful to walk them around and have them get excited about it! What a great family I have!
Next week we build lots of walls!
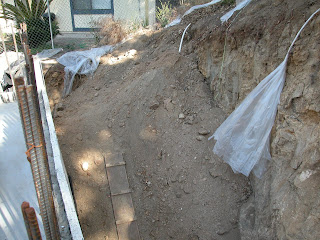
 First we had to spend a few days carving the rock back so there would be room not only for the walls, but enough room to do the waterproofing. This created yet another pile of dirt!


 Once the kitchen footing was dug, we started setting the steel, Then the HVAC crew from Precise Air came in to set a few ducts. In the picture below the main duct to the dining-room is on the left, and the suspended floor is taking shape on the right.


 ... and at the top of the stairs leading up from the living room. Under this section of form is the access to the crawl space.
 Now the steel mesh was placed, and the #3 rebars were positioned. The steel was ready!
 On the north wing of the house, the 2nd floor walls were starting to rise!


 Then they ran flex out of the box and through a hole in the concrete that I had plugged with foam before pouring. The flex will run to various major needs for power, a subpanel centrally located in the house, the AC condensers, etc.
  They also set the first box for outlets! This was very easy in the ICF. We simply cut a channel in the foam with a "hot wire" tool, attached the box to the concrete, then ran the flex in the channel and attached it to the box. Done! No drilling through wood studs, either! On a future blog entry I will show a little movie of the "hot-wire"! Not a typical construction tool, but very handy here!