Saturday, December 8, 2007

Catching up!

It's been quite a while since the last update! 

Since I last wrote,  a city crew came and re-finished the temporary patch over the water meter connection.  It was fun to watch these 2 men very efficiently do this job,  and finish it so well!


During the holiday breaks Kyle and his friend Austin helped out quite a bit.  It was great having these 2 young, energetic helpers!  I think they had a good time working together,  and hopefully learned a lot!  Here is Kyle helping to build the forms.


I was a bit too optimistic when I wrote that I might be able to pour after Thanksgiving!  This stage of construction has taken longer than I expected,  because it is very complex.  
I decided to prepare for one large pour,  one that would include the cellar footing and slab,  the foyer slab and the living-room slab,  as well as the stem walls that support these levels.  The 3 different floor levels involve a lot of custom forming,  and a very complex system of reinforcement.   


At the back of the garage where I did the slump backfill,  I built a removable form for the stem-wall that runs down the middle of the living-room.  It also supports the Am-Deck that forms the suspended portion of the living-room floor.

This view from the garage roof shows the Amdeck section built over the crawl-space. The floor will continue forward over the garage.  

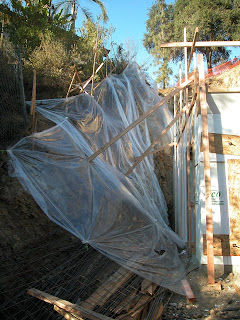
We have now entered the rainy season,  and even though Southern California is in the middle of a record drought,  I still needed to protect my temporary cuts from rain.  The light plastic I had put up before was getting torn apart by the wind, so I spent the time and $$ to use the heavier 6 mil black plastic.

Just in time!  We got a good rain storm soon after I put the plastic up!  In addition to the plastic on the excavations,  I lined the street fence with a dam of sandbags to prevent any dirt from washing into the public right-of-way.

In the next entry,  I will finally be caught up!  I'll really try not to get so far behind again!  

Friday, November 16, 2007

Cellar Steel

A lot of steel was set this week! The cellar level footings were completed, and the footings under the middle of the living-room floor were poured so that I could start building up the support walls.


First, the cellar. This level is mostly underground, so almost every wall is a retaining wall. This means that the footing for this level is another hefty one! I will also be using a different technology for some of the walls to save space. More on this in later entries.


I've started all of the walls supporting the front of the living-room and the living-room deck. Also visible here is the concrete pour behind the garage that includes the living-room intermediate footing and the bases for the posts.


The wall at the upper left of this photo is the front edge of the living-room deck. About 6 feet to the right where the ICF block steps down is the front of the living-room, which extends from there to the cliff on the right of the picture.


The 4 steel cages for the support columns are visible in the picture below. I poured the base for the columns so that I could take away the supports and set the sonotube forms in place. The lower columns go up to the foyer floor level, the tall one at the bottom of the picture goes up to the dining-room floor level.


Next week will be a short one, but I hope to install the forms and shoring for the living-room floor and set all of the steel for the living-room footings. If all goes well I should be able to pour the livingroom and cellar floors right after Thanksgiving Break!

Happy Thanksgiving to All!

Saturday, November 3, 2007

Cellar Footings, continued...

This week we ALMOST finished the Cellar footing excavation!


For most of the week I rented a jackhammer to cut the "key" of the footing. this is the deepest narrow trench at the bottom that locks the footing into the rock. The jackhammer broke out the rock and laborers shoveled it out. In addition to the keys, we also cut the bases for concree columns that will support the central tower all the way to the roof. The columns are 18" in diameter, with a large square base set in the rock.


After the bulk of the rock was removed, there was a lot of "fine-tuning" to do. All measurements were double checked, and details were cut by the smaller impact hammer, actially a roto-hammer that can have the "roto" part turned off. Because of the limited access, this footing and all future footings for this project are being done by hand-held equipment, and the dirt is carried out by wheelbarrow and bucket to the front of the garage to be removed. This week Mike came back and took yet another 4 truck loads away!

After weeks of renting a jack hammer, I finally broke down and bought my own!


It's is GREAT! I don't know why I waited! I found a website (TYLERTOOL.com) that sold me a factory reconditioned Makita for almost half the price, and it cost me about the same as renting for 9 days! By the end of next week I will have broken even! Not only will it save money, but it is really perfect for the job. The rentals were either too large (90 lb. or not large enough (25 lb.) My Makita is 35 lb. and so far has done the job admirably!

Also this week, the steel was delivered for the cellar and livingroom floors. I had the column steel pre-fabricated, and they are very well done!


Next week, we finish the cuts and lay the steel!

Saturday, October 27, 2007

Cellar Footings

With the dirt and ICFs cleared from the Cellar level, I was able to lay out this wing of the house more accurately. Because of the complexity of the floorplan and the multiple floor elevations (my own fault, I know!), it took some time to get the angles right, but after double and triple checking my math, I could confidently stake out the corners of the cellar, and how it related to the rest of the house. Over the week, the laborers and I leveled the pad and dug most of the footings.


I also marked out the exact placement of the foyer, and more importantly, the 6 posts that would support the central tower all the way to the roof. (see orange circles below). This as time consuming, and involved lots of triangulation to make sure everything would line up, but I feel pretty good about it all!


Next week we will finish cutting the "key" of the cellar footing, and hopefully get it all inspected!

Saturday, October 20, 2007

Livingroom Footing = MORE DIRT!

We continued to carve out the footings for the living room, but spent much of the week moving dirt around!


Mike the grader came back and took a few loads of dirt, but the most helpful thing was that he negotiated his excavator up the narrow hill to the cellar level and moved the majority of the dirt pile down to the driveway!


This made it a lot easier for him to load the trucks, and also allowed us to start laying out the cellar level footings!


Once we got the majority of the dirt out of the way, we moved the ICFs up to the next level, so the cellar footing could be laid out and excavated. That will be next week's task!

Sunday, October 14, 2007

Livingroom Footings

The first task this week was to make more room to work! We moved all of the AmDeck and as much ICF as possible to the garage roof and stacked it pretty high!


I also took the forms off of the slurry backfill.


Most of the week was spent digging the livingroom footings. They are on two levels, the lower level behind the garage actually supports a wall that comes up in the middle of the livingroom floor, then the upper footing is at the same level as the floor. It's fun to be able to stand on the level and imagine the floor projecting out over the garage.


There is one part of the excavation that didn't go quite far back enough so a few days were devoted to removing this section of hill and carting it away. The dirt pile started growing and by the end of the week, the entire cellar level was covered with 6 feet of dirt!


It also started spilling down in front of the garage!


Next week I finish the living-room footings and get rid of some of that dirt!

Sunday, October 7, 2007

Slurry Backfill

I passed my inspections on Wednesday, so after doing a little final prep work on Thursday, I was ready to do the first Slurry Backfill on Friday.


Slurry is a very sandy mix of concrete, it is stable when cured, but not strong enough to be used for walls or slabs. It is perfect for doing a quick backfill, since it can be done in one day and without multiple compaction inspections that would be required with a dirt backfill.


I filled both sides and the back, working my way around the garage so as not to get too high too fast. On the left side I created a dam so that the slurry would stay clear of the retaining wall I would need to build in the future.


On the right side I buried a section of 4" cast iron pipe for the sewer connection, being careful to cap the end so no concrete would get in.


By the end of the day I had filled the back side to the finished level, creating a new standing surface to continue building from, as well as a slab for a future storage space!


Now I can walk right out from the back of the garage to the hill! This is where the footing in the middle of the livingroom will be formed.


The laborer and I also cleared off the livingroom pad and marked out the placement for the livingroom footing. I can't wait to start cutting and forming that next week!

Also during this week, I met with the HVAC (heating and airconditioning) engineer who is designing my system. He has had the plans for months, but after visiting the site, he really got a much better feel for the job. He gave me some input on required openings, and went back with some notes to refine the drawings. It was exciting going over these details with him, and picturing installing this equipment!

I also got a visit from a plumber who was another recommendation of Ernie, the neighbor who had recommended the great concrete finishers. He seemed like a great guy, and I look forward to adding him to my team!

Saturday, October 6, 2007

Waterproofing

The Waterproofing crew came this week to do the garage walls. This is a 2 step process.


The first step is a very sticky liquid membrane that is applied by paint roller.


Once this has partially set, but while it is still tacky, the drainboard and fabric are cut from long rolls and applied.


The drainboard looks like a tiny egg crate pattern of little cups that hold the fabric layer away from the wall, creating a pathway that any water can travel down instead of soaking in and going through the wall.


By the end of the day they had done all 3 walls and just needed to come back the next day to touch up the corners. They were a very efficient and friendly crew!


The next step was to set the french drain around the bottom of the wall. First I ordered a large pile of gravel to be delivered, so large it completely blocked the driveway!


While I waited for the gravel, I installed the perforated pipe. This allows any water that makes it through the backfill and to the wall, then down the drainboard, to drain through the gravel and into the pipe that leads out around each side wall to the driveway.


With the help of 2 laborers during the day, and Kyle after school, we buried the pipe with gravel.


The gravel in the back wall had to be loaded into buckets, lifted to the garage roof by bucket, carried across to the back, and dumped over.


This was time-consuming and exhausting, but was finished by the end of the day. I was now ready for my next inspection!

Wednesday, September 26, 2007

The 2nd Pour!

Yesterday was the second concrete pour for our house, and a number of milestones were passed! The main thing was that this was my first ICF pour! All in all it went very well! We had a number of "challenges", but they were all worked out! The day was very hectic, so my photo coverage is not very good!

Here is how the day went:
The trucks were scheduled to arrive starting at 7:00am, so I got there while it was still dark, around 5:30. I had a few last minutes things to prepare, including building a little cradle to support the very heavy concrete pumper's hose as it goes up to the roof deck (see below), and a few other small thngs I just wanted to do. My laborer was scheduled for 6:30, so I had a good hour to fiddle around. Soon it was 6:30, then 6:45. Not only was my laborer not here, but the pumper had not shown up, and he has a lot of set-up that has to take place before the first concrete truck arrives! About 5 minutes to 7:00, both my laborer and the pumper rolled up! Luckily, the truck was also late! We were completely ready by the time it came! Also arriving was my deputy inspector. This is a private inspector I am required to hire whenever I pour high-strength concrete. On this house, that will be anything in a wall or on the AmDeck slabs. He supervises the pour, making sure the concrete is poured as designed by the structural engineer. He also takes concrete samples that are tested for strength at 7 days and at 28 days from the pour. More about that later.

The first truckload was used to fill the bottom 4' of the wall. After completely going around the walls, we were ready for the second truck. About 30 minutes later, it showed up. We went around the walls again, this time filling up the next 4', so the walls were almost all filled. The next truck was supposed to get there soon after, but about 45 minutes later, still no truck!
I called dispatch only to find out that the 3rd truck had been stuck in traffic for 2 hours! It was getting so late that I had to order a replacement truck, since the concrete would have been unworkable by the time it finally got here. The company totally understood and ordered a replacement truck. While we waited for the replacement, the 4th partial truck arrived. This is called the "cleanup" load, and is an addition to the original order. It seemed like the original 3 trucks was not going to be enough, so I had ordered an addiitonal 4 cubic yards.


We started pouring the very top of the walls and the roof deck system. This went very smoothly too, and faster than I expected. When the replacement for the 3rd truck arrived, we finished the deck. We didn't end up using the whole truck, when the deck was finished there was about 4 yards left! Oh well, I guess I should have trusted my original figures!

There were a few places where I got slight bulges in the forms, but no "blowouts" which was my main concern, as this was my first ICF pour. One of the bulges is visible here at the back corner. This will not be a problem, since it wil all be underground, but I now know to spend a little more time reinforcing at the corners!


Since the garage roof will be waterproofed and buried under the earth, I didn't have the finishers spend too much time doing a perfect job, but, once again, they were a great crew to have around, finishing the slab just right, and helping out on all aspects of the pour.

By the end of the day, we had poured all of the walls and the entire garage roof! A very successful first ICF Pour!

Friday, September 21, 2007

Ready for the Pour!

Last week showed a lot of progress and it felt like it went quickly, but we were far from ready for concrete. This week proved just how much was still needed! Dad and I worked 4 full days with a laborer's help part time, and just got the forms to the point that they could be inspected on Thursday.


Inside the walls there was a lot of fine tuning required. Additional supports and braces were added to the shoring and the AmDeck blocks were tied down so they wouldn't move. The joints between Amdeck blocks were sealed wih spray foam, and an additional 1" layer of foam was added to the top, to create a deeper concrete joist.


On the outside and at all openings, OSB was added to reenforce any potential weak spots as well as to hold "bucking" and anchor bolts in place.


The weather was forecast to be rain on Thursday and Friday, so we took the time to protect the hillside by covering it with plastic sheeting. Of course, the predicted rain did not materialize until the time of this writing (late Friday night), and so far it has been pretty minor!


Next, the rebar was added to the roof deck joists, and the steel mesh that reenforces the slab was laid in place. This was more difficult than it sounds, because it comes in 7'x 20' long sheets, and takes 3 men to manuever. All of this steel was tied in place and held off of the foam forms with little concrete spacers called "dobies". The top edges of the walls were reenforced with 2"x4"s where needed, and a safety railing was added. Finally, the forms were complete!

The Structural Observation inspection went well on Thursday, as did the City Inspection today.

I am approved for the next pour!