Monday, May 19, 2008

Kitchen Floor Forms and More Walls!

We finally finished excavating for the kitchen footing!  there was so much dirt that I ended up putting the last of it in a pile in the middle of the living-room! 

Once the kitchen footing was dug,  we started setting the steel,  Then the HVAC crew from Precise Air came in to set a few ducts.  In the picture below the main duct to the dining-room is on the left,  and the suspended floor is taking shape on the right.

The Dining-room duct will eventually connect to the HVAC unit in the garage,  but for now it will end in the crawl-space,  so that access in to the crawl-space is not blocked.


At the other end of the crawl-space is a complicated series of fittings that gets the duct up into the Amdeck,  through the concrete,  down into the cellar,  and up into the family room.

From the Cellar below the duct is a lot easier to see and deal with.  

The Amdeck makes it very easy to run ducts and other utilities,  I simply cut out the area I need with a sawsall.  The crew custom assembled the duct outside,  then installed it from below.


FORMS
One edge of the kitchen slab is at the back of the music nook in the living-room.  Junior,  one of my laborers has gotten really good at building strong forms!  Here are a few of his taller forms, the back of the music nook ...

... and at the top of the stairs leading up from the living room.  Under this section of form is the access to the crawl space.
Here is a view down the crawl space with the forming in place.  it is only 24" high!  One of the electricians actually snaked his way through this to set a piece of conduit at the far end!  

Now the steel mesh was placed,  and the #3 rebars were positioned. The steel was ready!

On the north wing of the house,  the 2nd floor walls were starting to rise!  

This is the Master Suite,  looking back toward the Bathroom window.

We also took some time to move the Amdeck out of the garage and stage it close to where we would needed it next.  

This allowed the electricians to start!  First,  they set the main panel and permanent meter at it's position in the buttress between the garage doors.

Then they ran flex out of the box and through a hole in the concrete that I had plugged with foam before pouring.  The flex will run to various major needs for power,  a subpanel centrally located in the house,  the AC condensers,  etc.  

They also set the first box for outlets!  This was very easy in the ICF.  We simply cut a channel in the foam with a "hot wire" tool,  attached the box to the concrete,  then ran the flex in the channel and attached it to the box.  Done!  No drilling through wood studs, either!  On a future blog entry I will show a little movie of the "hot-wire"!  Not a typical construction tool,  but very handy here!


In the next entry,  the Kitchen Slab is poured!


Sunday, May 4, 2008

Kitchen Floor, Almost the Last Footing!

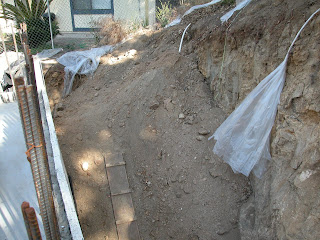
Most of this week has been spent excavating the footing for the kitchen/dining room. While the footing is very close to the same dimensions as other footings, our previous experiences have made us much more efficient. We made the cut and kept the levels with much more precision than in the past. There is also an intermediate footing that will support the Amdeck,  creating a crawl space behind the cellar.


The huge pile of dirt thrown over from the footing above was smaller,  thanks to all of the backfilling,  but there was still too much dirt in the way... 


... so we spent a few days bucketing the dirt on top of the nicely compacted areas of backfill. It seems inefficient,  since it will all have to be removed and replaced 6' at a time,  but I had to stockpile the dirt somewhere so we could continue building!  The stockpiled dirt is so high behind the livingroom that I can now walk right up onto the back part of the lot!


Also this week,  I had a big steel order delivered,  enough to finish the kitchen floor and get the Master Bedroom walls started.


Once the dirt pile was cleared,  we did the fine tuning,  cut the "key",  and started laying in the steel.  By the end of the week,  all of the stirrups were in place!


The Kitchen was not the only digging we did!  When ever there was a free laborer,  I had them working on the trench to connect to the sewer.  


They also dug a pit at the street property line to look for the "lateral",  the pipe that supposedly was placed from the sewer main to my property line back in 1961 when they put the sewer in.  I was concerned about this,  because the official computerized city maps showed the connection coming off of the manhole,  yet when I pulled off the manhole cover there was no pipe coming in.  To add a new lateral connection is a very expensive project,  so I went back to the city for more information.  I found a helpful person who went back to the original hand drawn maps from 1961.  It clearly showed the location of the lateral as coming from a point down the sewer line,  NOT right from the manhole.  We dug a pit based on this old map ... 


... and found the lateral,  right where the old map said it would be!  All we had to do was follow the hole that was compacted fill,  and it lead us right to the connection.  Here is the hole,  with a bucket covering the actual connection.  I know it seems like a silly thing to get excited about,  but I was thrilled to find it!  


Next week,  the rest of the steel gets placed, as well as more underground ducting,  and the forms get installed!


Thursday, April 24, 2008

What to do with all of this DIRT???

How time flies! It has been another busy month, so busy that I have not been able to update this blog until now!  Here is a look at what's been happening:

After the Livingroom and cellar walls were poured, I had the waterproofing crew out again to do these new walls. It was tight work, especially around the chimney, but they did a fine job.

By the end of the day they had wrapped all the walls from the livingroom north wall,


...around the back...


...all the way around to what will be a planter outside of the cellar door.


After the waterproofing was up, we set the french drains and hauled gravel up from the street one bucket at a time. The french drain needed to have about 8" of gravel on top, then a sheet of plastic was laid to prevent the slurry from clogging the drain.


After the drain was inspected, I pumped a slurry mix of concrete behind some of the walls. Slurry is a very soupy concrete, with a lower percentage of cement in it so it can't be used as structural concrete, but it makes a very good backfill, especially when there is a "surcharged load", meaning that a footing is so close to the backfill that it is putting pressure on the backfill. It also is a very efficient way of backfilling these hard to access areas because it can be quickly pumped in with no compaction inspections required!

Here is the slurry behind the cellar that supports the kitchen footing:


This is behind the livingroom. This is not an area with a surcharged load, but it is a lot of area to fill, and the 3 feet of slurry got me started nicely! In the picture below I have already started placing dirt on top of the slurry.


Here is the first layer of compacted fill on the south side of the cellar.


Before I could backfill on the north side of the house, an HVAC duct had to be placed. This was very difficult work, involving some custom metalwork to fit into the tight space!

This duct brings the heating and AC into the back part of the livingroom. It was easier to run the duct outside than to run it under the slab and footing.


This duct runs from the 2 vent openings on the north wall, around the chimney and down through a hoile into the side of the garage where one of the HVAC units will be located.


After the duct is custom fitted into the space, all seams are sealed, and it is attached to the ground using stakes and brackets. This keeps the duct from floating up when the concrete is placed.


The process of backfilling with dirt is time consuming but important. After about 6" of dirt is placed and raked level, it is moistened and mechanically compacted, then the next 6" is added.

This process is repeated until 2 feet has been compacted, then it is tested by a representative of the Soil Engineer. Chris from Technosoil is shown below with the compaction testing device. First, a pointed rod is driven about 2' into the ground then removed, leaving a hole. Then this device is placed over the hole and a rod with a small amount of radioactive material is lowered into the hole.


Somehow, the machine is able to sense the density of the soil, and based on numbers gathered from a lab test of my soil, it gives a percentage of density. The required minimum density is 90%, and as the picture below shows, we were consistently getting between 93 and 94%!


Here's a look at the compaction process:


As the backfill got higher, a temporary dam was built to hold back the compacted fill. As soon as I build the planter wall, I will remove the dam and compact behind it.

The wall behind the livingroom now has about 4' of compacted fill. we had to maintain a 45 degree slope on the end of the fill so we could continue to walk up to the top with buckets!


The fill on the south side of the cellar is almost level with the slurry. There is now about 6 feet of compacted dirt in there!


I also took time this month to remove all of the forming and shoring. For the first time, the entire entry door opening was visible, and it's tall!


The livingroom is finally visible too, as this view shows looking toward the foyer:

Looking into the livingroom from the foyer:

Here is the arch detail over the music alcove in the livingroom:

Here is the cellar area without shoring:


Next, we get ready to pour the kitchen footings and slab!